3. (continued) With the neutral gray filled layer active, go to the Filter menu and select Render-->Lighting Effects... Set the options in the Lighting Effects dialog to match the settings in the screen shot below. Make sure the texture channel is set to the outline bump channel we created in step 2. After you've made the settings hit the OK button.
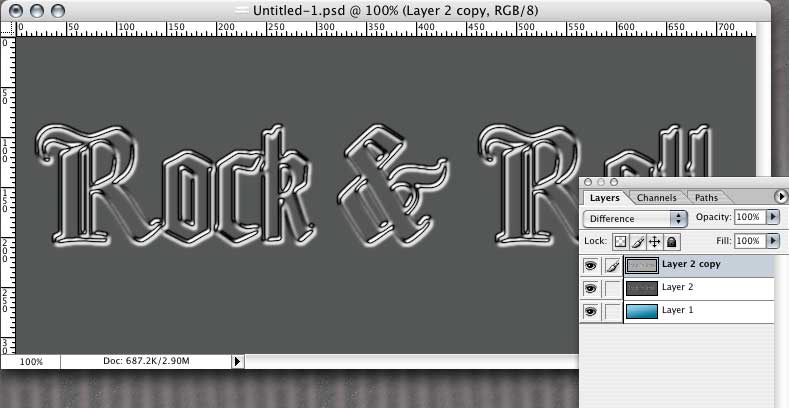
4. After the filter runs, your layer should have a smoothly embossed image of our type outline. Drag that layer to the new layer icon at the bottom of the layers palette to duplicate it. The new, duplicate layer should now be the active layer. Press command-i (control-i pc) to invert the image on this new layer. Then set the blend mode popup for this layer to Difference. The following screen shot shows the results as well as what the layers palette should now look like.
5. With the top layer active, under the Layer menu select Merge Down, merging the two outline layers into one. In the Channels palette command-click (control-click pc) the "outline" channel to load it as a selection. Under the Select menu choose Modify-->Expand. In the Expand dialog box enter 1 pixel. Now we want to invert the selection so the background is selected instead of the letter outlines so under the Select menu choose Inverse or type command-option-I (control-alt-I pc) to invert our selection. Now press the delete key to clear the gray background, leaving us a nice shiny, metallic outline to our type sitting above our background layer.

6. Now we need to repeat the same process with the original channel for the fill of the letters. Duplicate the channel "original" by dragging it to the new channel icon at the bottom of the Channels palette. Double-click the new channel and rename it "fill bump". Command-click (control-click pc) on the channel to load it on itself as a selection. From the Filter menu select Blur-->Gaussian Blur. Enter 2 pixels and hit OK. Hit command-option-F (control-alt-F pc) to bring up the Gaussian Blur dialog again. Enter 1 pixel and hit OK. Hit command-F (control-F) to repeat the Gaussian Blur filter. Press command-D (control-D pc) to drop the selection then press command-F (control-F pc) to run the Gaussian Blur filter one more time and soften the edges of our bump map.
7. Back in the Layers palette make the bottom, background layer the active layer. Click the new layer icon at the bottom of the palette to create a new layer. Make sure the foreground color is the neutral gray we created in step 3 and press option-Delete (alt-Delet pc) to fill the new layer with the neutral gray.
Under the Filter menu, select Render--Lighting Effects... We want to use the same settings that we used in step 3 except we now need to use our fill bump channel for the texture channel and I set the height to 9 for a bit more emboss. After running the filter, the layer should look like this.

Step 8 begins on the next page.
| Back | 1 2 3 | Next |
| Back to Photoshop FX | Back to Photoshop main | ||